Visual tour of the Discussions tool
There are five key points of navigation in the Discussions tool to help you create and manage discussions in your course.
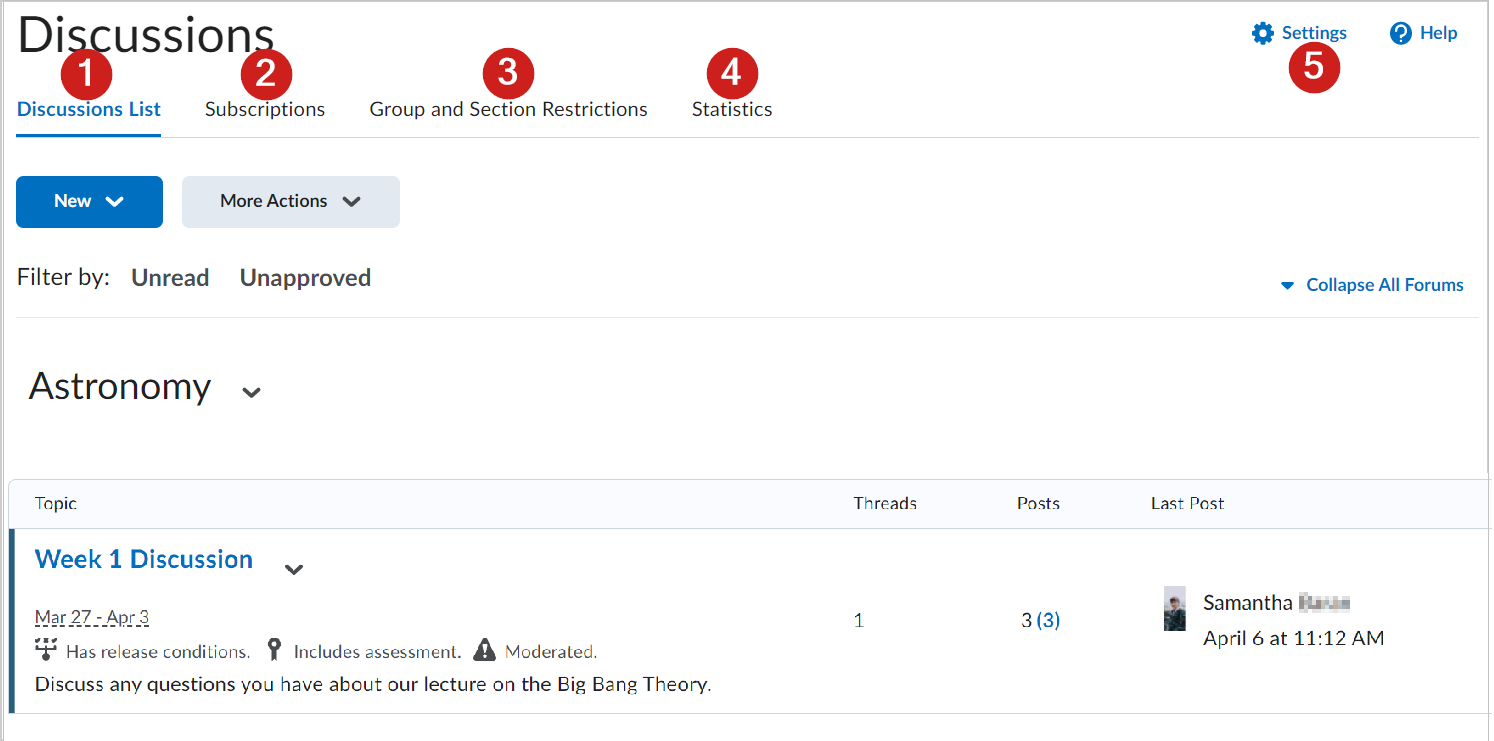
Figure: Overview of the Discussions tool interface.
- Discussions List: Displays an overview of forum topics. Click the topic link to view threads in that topic, or click the drop-down button beside the topic for more options.
- Subscriptions: Set your default notification method for the discussion items you are subscribed to. You can also use the Change your notification settings link to update your contact methods, summary of activity, and what method is used to receive instant notifications for various tools and features.
- Group and Section Restrictions: Set restrictions for individual sections. You can also set restrictions for individual learners within a group or section.
- Statistics: An overview of the activity levels in your Discussions. This area is divided into two tabs: User and Forum and Topics. Org Unit Statistics are displayed on either tab.
- Settings: Configure your personal display options, org unit (course) settings, and the default settings for availability conditions.
Create a New Forum
- On the navbar, click Communication and select Discussions.
- On the Discussion page, expand the drop down next to the New button and choose New Forum.

- Enter a title (required),
- Enter a description (optional).
- Select which options you want to apply to the forum. Note that selecting these options at the forum level will cascade down to all topics in the forum. You can also wait and choose these options only at the topic level.
- Select the Save and Close button.
Forum Restrictions
Click on the Restrictions tab to set restrictions on the Forum.
Restrictions set at the Forum level cascade to every topic in the Forum. You can also set these restrictions at the Topic level which may allow for a better work flow.

Create a New Topic
On the Discussion page, expand the drop down next to the New button and choose New Topic.

- Enter a title (required).
- You can change the forum for the topic, or create a new one by clicking on the change forum link.
- You can link the discussion to a grade item in the gradebook
- Enter a description (optional).
- Click Save and Close to exit.
Note: To return to the old Discussions page layout, click the highlighted dropdown arrow in the upper right corner of the Topics page. This will allow you to turn off the new experience. You can toggle between the two as often as you like.

Advanced Settings
For guidance on additional Discussion, review these related Knowledge Base Articles:
Availability Dates & Conditions
Discussions: Posts & Completion and Evaluation & Feedback